How to Dry Fire for Maximum Speed and Accuracy: Two Proven Methods to Train Your Eyes and Shoot Faster

Dry fire is one of the most effective and accessible training tools for competitive shooters. Whether you’re working to improve your Steel Challenge times, preparing for Rimfire Challenge, SASP, Metal Madness or simply trying to become a more consistent and confident shooter, proper dry fire training will transform your performance.

In this guide, I break down how to dry fire, the two primary methods, and the visual techniques that helped me drastically improve my performance on Steel Challenge stages like Pendulum and Showdown.

Whether you shoot a red dot or iron sights, this post will teach you how to SEE faster—and shoot faster.

Training Banner Link:
https://creeksidecustomlasering.com/training/dry-fire-banners/


Why Dry Fire Training Works

Dry fire builds:

  • Faster transitions
  • Stronger visual discipline
  • Better shot-calling
  • Cleaner mechanics
  • Match-ready confidence

With no recoil or noise, dry fire isolates the most important skill in speed shooting:

Seeing.

If you want faster times on any stage your eyes are the KEY and must lead the way.


Dry Fire Method 1: Using a Par Time on Your Timer

Timers with par times are extremely helpful when learning the true pace of a stage. One of the best tools for this training is the AMG Lab Shot Timer, known for its reliability and ability to pick up dry fire trigger clicks (on sensitivity setting 10).

How Par Time Dry Fire Works

  1. Select the stage you want to work at (Pendulum, Showdown, etc.).
  2. Set a par time matching a competitive or GM-level string.
  3. Pointed at the low-ready; on the beep
  4. Try to complete all simulated shots within the time limit.

On visually intensive stages like Showdown, where rhythm and timing matter, par times help you understand how fast top shooters actually move.


Dry Fire Method 2: Running the Stage With or Without a Timer

This is the method I use most frequently because it trains visual processing instead of speed dependency.

You can still use your AMG Lab timer with a delayed start, but you don’t need a par time here.

How This Method Works

  • Set a delay beep—or go without a timer.
  • Start the run.
  • Actuate the dead trigger on each target.
  • Focus solely on what your eyes are doing and NOT how fast you’re going.

Why This Method Is So Effective

It develops:

  • Subconscious stage rhythm
  • Plate-to-plate timing
  • Natural transitions
  • Visual discipline
  • Calm, confident shooting
  • Reliable shot-calling

On stages like Pendulum and Showdown, where visual control determines everything, this method builds long-term consistency.


How to See Faster: Plate Focus vs. Hard Dot/Hard Front Sight Focus

Dry fire only works when you intentionally train your eyes. Here are the two visual techniques used by most top shooters.


Visual Technique 1: Plate Focus Shooting

This is the traditional, widely used method.

How It Works

  • Your eyes lead the gun to each plate.
  • You visually lock onto the plate.
  • The dot or front sight follows your eyes.
  • When the dot/site arrives on the plate, you break the shot.

When It Works Best

  • First shot on any Steel Challenge, Rimfire Challenge, Metal Madness, etc array

Plate Focus Shooting can be effective but not the fastest for transitions.


Visual Technique 2: Hard Dot or Hard Front Sight Focus (My Preferred Method and What I Teach)

This method is responsible for some of my biggest improvements and speed gains.

How It Works

  • Your visual focus stays locked on the dot (if shooting an optic)
    —or—
    On the front sight (if shooting irons)
  • Plates appear slightly blurred in the background
  • You break the shot the moment your dot/front sight sees the blur of white in the background.
  • You never shift your focal plane between shots

Why This Method Is Faster

  • Eliminates refocusing delays
  • Smooths transitions
  • Enhances shot-calling
  • Reduces visual hesitation
  • Lowers stage times by 5–10%

When I shoot like this, the stage is a two-dimensional array and I am in a Hard Dot Focus Shooting, it actually feels like I am shooting slow.


The Most Overlooked Concept: Your Eyes Pull in EVERYTHING

This is the part most people do not realize until someone shows them.  If you have been to train with me, this is the ‘finger’ and the ‘tree’ exercise.

Just because you’re focusing on the dot or front sight doesn’t mean you can’t see the rest of the array.

Your eyes naturally take in a massive amount of visual information even when you’re focusing intensely on your aiming reference.

When your focus is on the dot/front sight, your peripheral vision still sees:

  • The spacing of plates
  • The arrangement of the array
  • The overall stage landscape

Trust your eyes.
They will bring in all the information you need.

This trust allows you to:

  • Transition efficiently with fewer sight alignment adjustments as you get to the plate
  • You are now able to confirm shots with a higher degree of certainty
  • Shoot without hesitation
  • Stay calm and fluid
  • Let your subconscious drive the gun

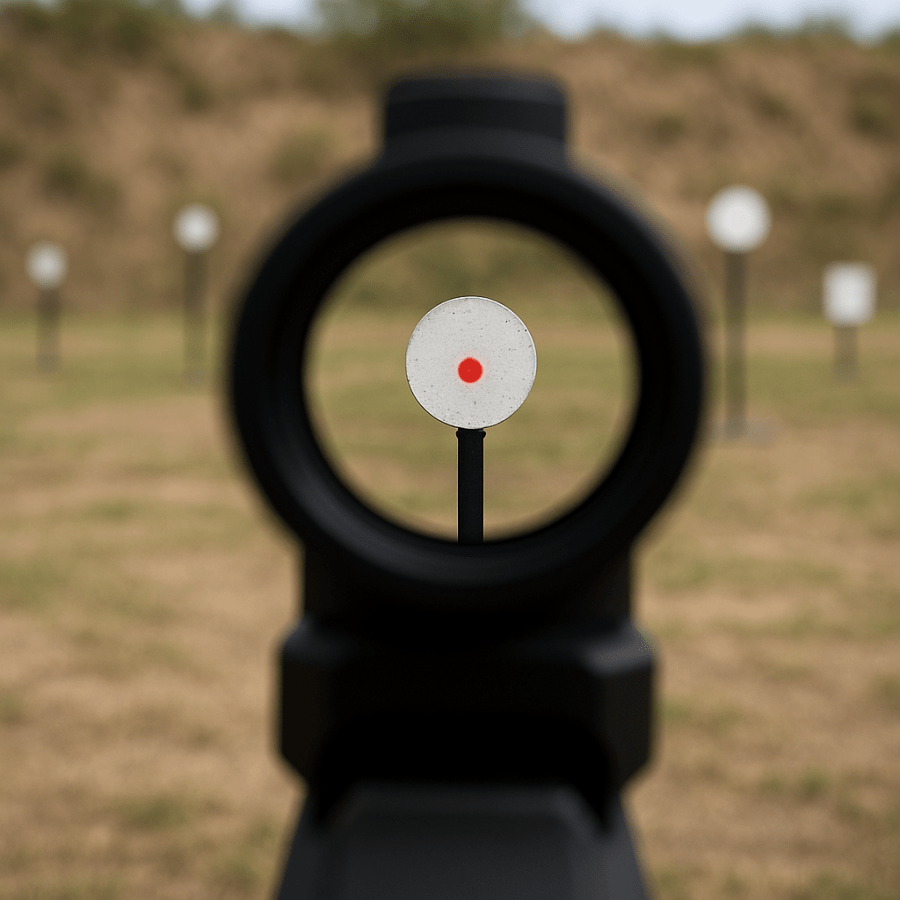
Below is a visual representation of how this looks for an optic gun. This is how top shooters create runs that feel slow even though they’re faster than ever. Just remember, despite popular opinion the targets do not move when the timer goes off 😊


How I Combine Both Visual Methods in Dry Fire and ‘Shoot’ the Stages

Using Steel Shoot Dry Fire Banners, I follow the same sequence every time:

1. First Shot – Plate Focus

Ensures accuracy and a clean opening shot.

2. Shots 2–5 – Hard Dot / Hard Front Sight Focus

Delivers maximum speed, timing, and consistency.

This hybrid approach builds both accuracy and speed—and it transfers perfectly to live fire and matches.


Dry Fire Isn’t About Speed… It’s About Seeing

This is the core truth of dry fire:

You can only shoot as fast as you can see.

As your visual processing improves:

  • Your transitions clean up
  • Your dot/front sight stabilizes sooner
  • You call shots instantly
  • Your runs feel effortless
  • Panic (the “Foster Effect”) disappears

And your times drop even though the shooting feels slow.


Train Like a Pro at Home

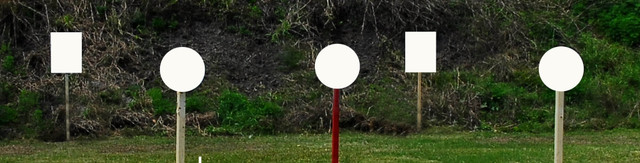
To get the most out of dry fire, you need realistic plate layouts.
That’s exactly what Steel Shoot Dry Fire Banners provide.

They bring Steel Challenge stages like Pendulum and Showdown into your home or garage, giving you consistent, match-relevant training.

Check out the Steel Shoot Dry Fire Banners here:
https://creeksidecustomlasering.com/training/dry-fire-banners/

When you are Dry-firing, keep yourself honest.  Was the dot on the plate or not when you pulled the trigger.  “Cheating” yourself doesn’t do you any good out on the range.  You have to practice ‘perfectly’ to get better.  Try different methods and find the right combination for you.  When you combine the right dry fire techniques and your speed, transitions, and confidence will increase dramatically as you see your stage times drop!

See you out on the range soon!

Steve

How Steel Shoot Dry Fire Banners Transformed My Training and My Match Performance

As a competitive shooter, I’m always looking for ways to sharpen my skills, especially when range time isn’t easy to come by. Between weather, travel, and everyday life, live-fire practice isn’t always realistic. What is realistic and incredibly effective is dry fire training. And one of the biggest game-changers in my routine has been the Steel Shoot Dry Fire Banners now offered by Creekside Custom.

Product link: https://creeksidecustomlasering.com/training/dry-fire-banners/


Why I Started Using Steel Shoot Banners

Like most shooters, I knew the value of dry fire, but I didn’t have a consistent system that helped me train the way I compete. Steel Shoot Banners changed that for me five years ago. They give you:

  • Accurate stage layouts
  • Consistent target visual references
  • The ability to train your eyes
  • A structured environment that mimics match stages

For Steel Challenge specifically, training your eyes is just as important as trigger control. Your eyes drive the gun, and the banners create that visual discipline even when you’re standing in your living room or garage.  All you need is a wall and 5’ – 10’ of distance for all stages


My Routine: Only 10–15 Minutes Every Other Day

I was skeptical when I was gifted my first set of banners, so I put it to the test.  For two weeks,  I committed to a simple rule:
10–15 minutes of structured dry fire, every other day.

That’s it. No hour-long sessions. No overtraining. Just consistency and discipline.

Using the Steel Shoot Banners setup, I practiced transitions, and visual focus for each plate.  What I had to keep myself honest with is where my eys/dot/plate relationship was when I ‘pulled’ the trigger (which I simulated with a ‘dead’ trigger pull each time)

And the results were undeniable.  The AMG Timer did not lie.


Real Results: From 1.90–2.00 Seconds to 1.55–1.70 Seconds

I focused specifically on the Steel Challenge stage Pendulum, one of the most visually demanding stages in the sport.

Before the two-week banner-based training block, my RFRO times were consistently:

  • 1.90–2.00 seconds per string

After two weeks of disciplined dry fire using Steel Shoot Banners I setup and shot Pendulum:

  • 1.55–1.70 seconds per string

That’s a major improvement in a very short period—and it wasn’t from shooting thousands of live rounds. It was from sharpening visual discipline.  I saw things so very clearly.


The Key: Discipline and Consistency

The Steel Shoot Banners work but only if you work and put in the time.

If it’s raining outside…
If you don’t have a range nearby…
If your schedule is tight…

You can still train like a professional shooter.

You can still build the visual discipline that lowers your stage and match times.

The banners give you the environment you need. Discipline provides the results.


Taking It to Competition: Rimfire Challenge World Championships

I used this system heavily in the weeks leading up to the Rimfire Challenge World Championships, and I’m proud to say:

I won my age group.

The stages weren’t the same as Steel Challenge but the training absolutely carried over. Any time you train your eyes to track, transition, and pick up targets efficiently, you gain a competitive edge.

Steel Shoot Banners aren’t limited to Steel Challenge they make you a better shooter, period.


Final Thoughts

Dry fire is the secret advantage of top shooters, and Steel Shoot Banners make that training consistent, repeatable, and incredibly effective.

If you want to improve your times, tighten your transitions, and build visual speed—even when you can’t get to the range—these banners will get you there.

Train with the same system I use:
https://creeksidecustomlasering.com/training/dry-fire-banners/

See you out on the range soon!

Steve

The Pursuit of Perfection – Rimfire Pistol Iron Sights

As a competitive shooter, I am always looking for an advantage to shoot faster! One of my first ever Handguns was a Ruger Hunter on the traditional Standard Frame which most call the Target Frame. Being a 1911 fanatic, I prefer the 22/45 frame so I repurposed a spare 22/45 frame and placed the Ruger Hunter 6.88″ upper on it. Wow, did it feel amazing! I then added the Creekside Custom 19.22 https://creeksidecustomlasering.com/19-22-rimfire-trigger-for-ruger-volquartsen-tandemkross-pistols trigger with the Volquartsen Accurizing kit https://creeksidecustomlasering.com/volquartsen-accurizing-kit-ruger-mkiv/ to achieve one of the best triggers ever felt in a .22 platform. I like some weight in my hand, I added the Solid Brass Big Daddy grips and Magwell https://creeksidecustomlasering.com/solid-brass-big-daddy-grips-and-magwell-for-the-22-45-mkiv/ to add 15.7oz. For enhanced reliability I installed a Volquartsen DLC coated bolt. I hope it shoots half as good as it looks!


Initial Impressions
Right out of the box, the Ruger Hunter impressed with its long sight radius and familiar feel. The 22/45 frame adds a comfortable grip angle, and the extended barrel is extremely accurate, I was stacking shots on top of each other at 35 yards on the back plates of Outer Limits – free hand. The trigger setup limited sight disruption at speed to include the short reset.


At the range, this pistol delivered. It shoots great, grouping tightly at 35 yards with Eley Contact. The added weight from the brass grips and magwell lessens sight disruption as well. The 1.7lb trigger break with short reset enhances precision, though the return to sight picture is just a tad slower compared to my other Volquartsen Mamba X Iron Sight gun I have been shooting in competition. This isn’t a dealbreaker, but I’m addressing it with the planned compensator, which should speed up the return to center of the sights.

Does the return to sights really matter? If you are a new shooter it probably does not help you much. Over time, as your speed builds, it makes a significant difference. I was talking with Lance Bratcher Jr the other night, who has logged the fastest times shot in Rimfire Pistol Iron and Rimfire Pistol Open in Steel Challenge. He noticed a big difference with the trigger and then with the Brass grips and Magwell. The sights don’t seem to move. The reality is they move slightly but it is a blink of the eye and they are back to where you expect them to be. As I say, you can drive the gun harder and with the additional weight and less trigger movement you have less sight disruption. Less time hunting for the sights and more time getting on target faster!


Pros
• Exceptional accuracy with the long barrel.
• Custom brass grips and magwell add weight and style.
• 1.7lb trigger break with short reset thanks to Volquartsen internals.
• Smooth trigger with short reset.


Cons
• Return to sight picture could be quicker – good return to sights.
• Threading for a comp will be an additional step and $, but worth it.


Next Steps
I’m excited to thread the barrel for a compensator (Falcon II https://creeksidecustomlasering.com/falcon-ii-rimfire-compensator-for-pistol-1-2-28-thread-pitch/ ), which should mitigate the slight delay in sight alignment and enhance overall control. When threading, we’ll move the front sight back 0.5” to accommodate the threading. I’ll update this post with range results once that’s done. For now, this Ruger MKIV Hunter is a solid base for a custom build, blending factory precision with personal flair.

Stay tuned!

Shooters making products for shooters..

Steve

I made it!

When I was younger I was a huge fan of Lincoln Logs. If you are reading this and you don’t know what Lincoln Logs are, they were Legos before Legos existed. The cool part is you were always able to build something with some basic components. The only limitation was your imagination, well until you ran out of logs or shingles! For me, building something better, cooler, functional was the highlight of my day. As I fast forward 40 years later, this is exactly what I am doing with Creekside Custom. Building products for Shooters by Shooters.

Ruger has been around for since before I was a kid. At the time, it was the entry level into how I started shooting. I remember when I opened my very first gun, I was 8 years old and that Santa did a great job that year leaving me a 10/22. A couple years later the first handgun I shot was a Ruger MKII. Needless to say, as I made a decision to base some of my enhancements to the Ruger Platform, I sought out to unleash the potential of the MKIV platform. In full transparency, there were ideas I had for parts in which I provided other companies ideas for. Some were made or changed, and others were not. I do not fault these companies, the market I enjoy and choose to exercise my 2nd Amendment rights is a very small market. So, I made the decision to do it myself.

Recently, I co-released two of the last products I plan to make for the MKIV; the 19.22 trigger shoe and the ICE Bolt Racker. Let’s start off with the Bolt Racker. There are other rackers on the market that are cost effective and they do a great job preventing your fingers from being pinched when racking the bolt. I did not find a version for competitive shooters to use In Case of an Emergency if you had to rack the bolt quickly similar to an Open Gun. The design was created to twist on, be effective, and ergonomically friendly. Mission accomplished. Yeah and it looks really cool as well!

Early in my shooting career I spent a lot of time shooting 1911s and I absolutely love the trigger length, the pull weight, adjustable pre-travel, glass rod break, reasonable over travel, and short reset. Oh, and the straight/flat face is something I strongly prefer in my triggers. As with other parts, I decided to make my own. As prototyping came along, the trigger felt just like my first 1911 and this is why it is named the 19.22. The mechanical advantage of setting the trigger shoe back helped in a couple of areas, mainly it decreased the average trigger pull around 1/2 pound in testing. The other magic for me is the reset is positive and short. My second – third – fourth – fifth shots at the 2024 RCSA World Rimfire were better and faster than I have ever shot with a rimfire iron pistol. A small detail, it happens to be aesthetic as well, is the small hook at the bottom of the trigger that scoops the trigger finger to the right spot every time.

The 19.22 trigger far exceeded expectations with selling nearly half of the first run in the first two days and selling the remaining triggers in the next five days. What was unexpected was the amount of posts, emails, messages, and calls of support from people in the industry. Outside of the sales, this is when I knew that people wanted the same thing I did. Thank you to everyone for your support. I was talking with a manufacturer the other day who congratulated me. I asked why. He said there is a small group of people who are willing to put the time, money, and effort in bringing their ideas to a reality. Never thought of it that way. After going through the process with creating a developing several products, I know why people don’t do it!

What is next? Great question. Working on something cool next. Need to let sales happen to replenish the bank account to fund the next project! If you have ideas – please reach out. I can’t say yes to every project, but at a minimum I can offer the insight I have gained through this process.

See you out on the range soon!

Steve