The Flight of the Falcon

In the spring of 2016 an idea emerged to design a rimfire compensator, which was effective, has a cool aesthetic, and would be a value for most shooters.  I have never taken a concept and brought it to market, but despite the perceived complexity, I knew it was something I wanted to do.  I will save you from the mundane details of finding partners with design/machining capability who had the same passion as I did around this project.  I approached Todd at Wiland USA and he was excited about the opportunity.

We agreed to the terms of our partnership in the project and the creative juices started to flow.  In the spirit of sharing some perspective without giving away trade secrets, I will walk you through some of the design and trial phase.  We set a time to talk through an initial design with the list of characteristics I would like to see and below is the first sketch of one of the concepts for the Rimfire compensator.  I was enthusiastic the design I had in my head was starting to actually materialize. 

The next iteration after resolving some of the dimensions of what will work with the most barrels out on the market was key.  Afterall, as a competitive shooter I wanted to make sure I did not ‘feel’ the compensator at the end of the gun.  Too many times other designs feel ‘clunky’ when starting and stopping guns as we make hard transitions.  The next step in the design phase was to incorporate the rest of the list of the design elements.  Initially, the front of the compensator did not have the extra 45 degree cut and Todd drew it up with it.  It was a great example of collaboration.  It was lighter at the end of the gun where it matters most and it had the styling cues of a fighter jet.  Below is the next working design.

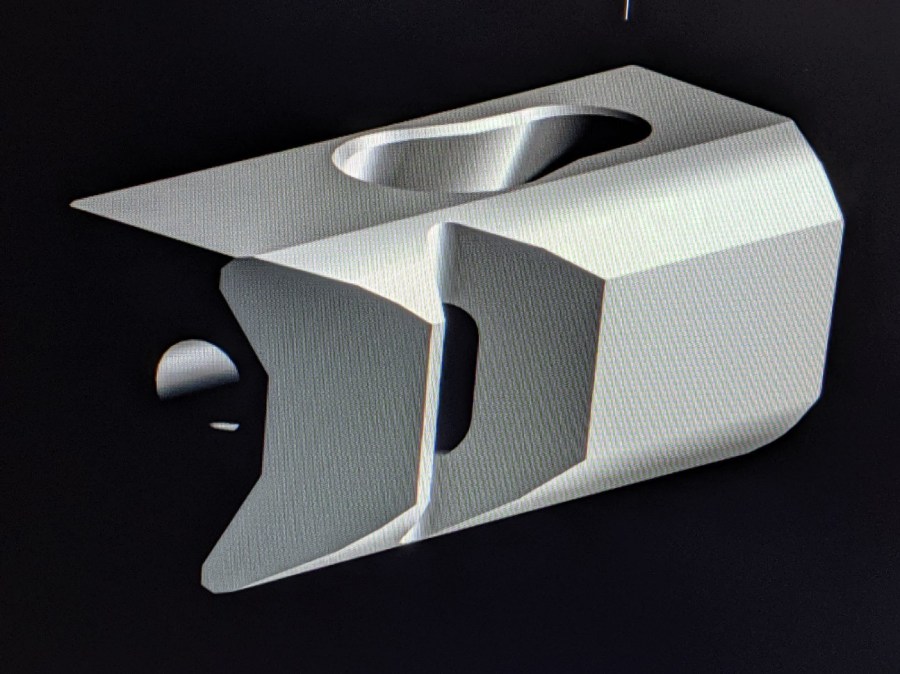
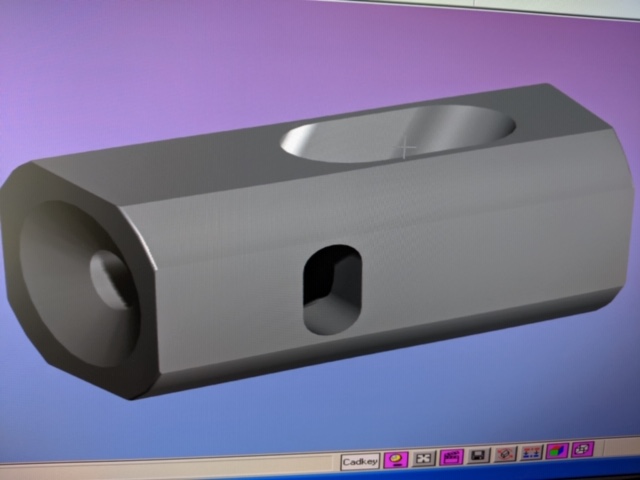
The top port went from an elongated hole to a key styled hole to create a progressive gas escape pattern pushing down on the front of the gun harder.  We then smoothed out the key-hole design to create a better functional aesthetic with a ‘tear-drop’ style top-port.

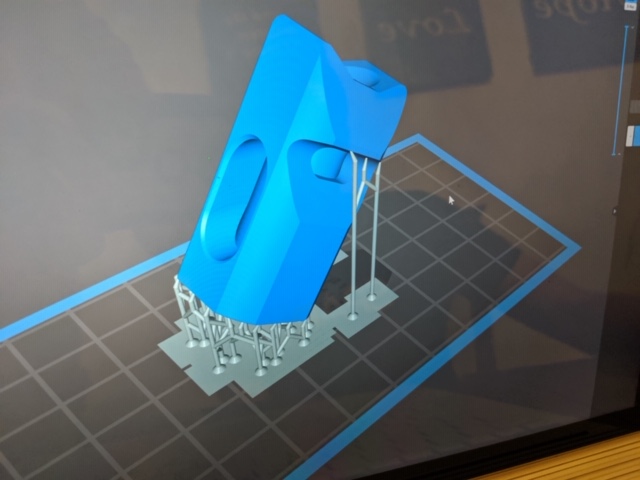
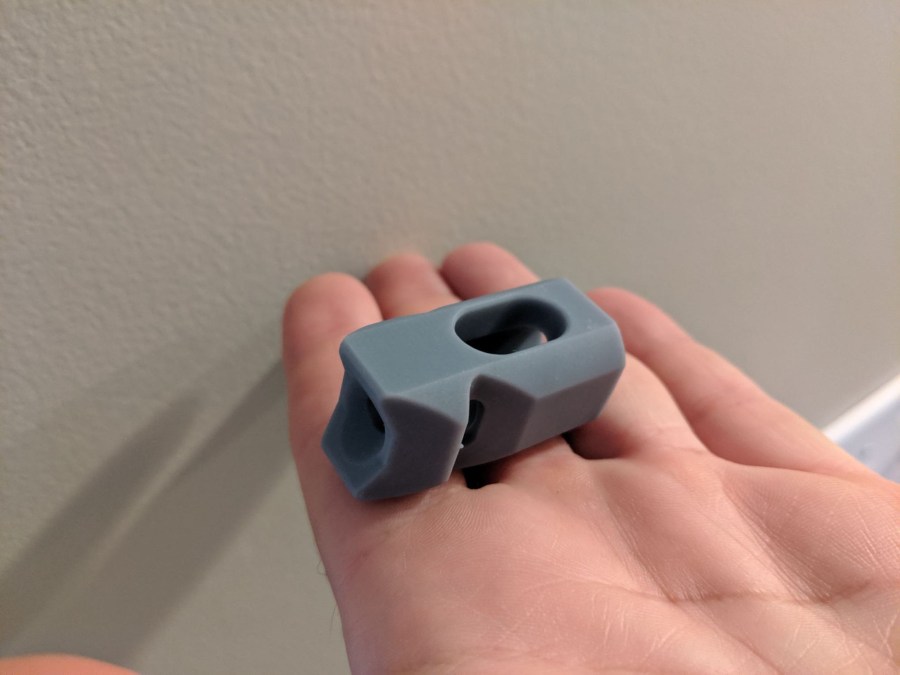
Shortly after we polished up the design we had to actually make one to see how the Two-dimensional drawing would translate into a Three-dimensional part people would get excited about.  Thorugh the use of a 3D printer, our drawing became a reality as seen below.

The first time I saw it, I wanted to shoot it so bad!  Afterall, we had to test our design and move the project to the trial phase.  Not knowing if the 3D generated prototype would take the pressure of a high-velocity round, we agreed to make two working compensators out of aluminum for proof of concept and design.  Todd at Wiland USA created the first two;

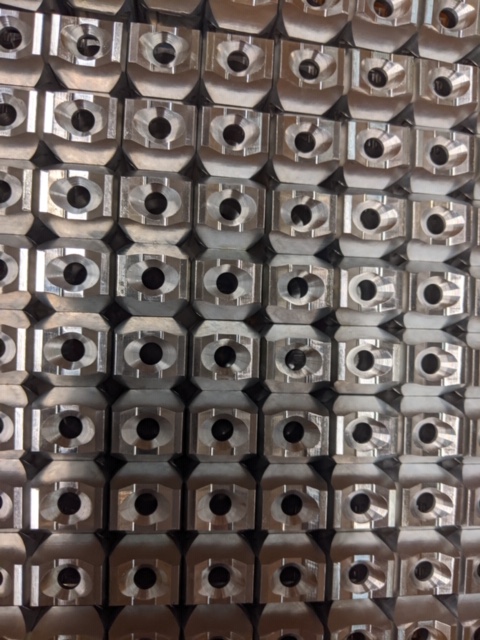
The machine work was amazing, especially for two ‘one-offs’.  Todd asked me for my logo and where we think it should be placed and I told him it would be great to have on the compensator, but I wanted it discreet, which was an important branding decision.  For these two he powder coated them and engraved my logo.  It was at this point, the reality of bringing this project to fruition was upon me.  Words cannot describe how I felt.

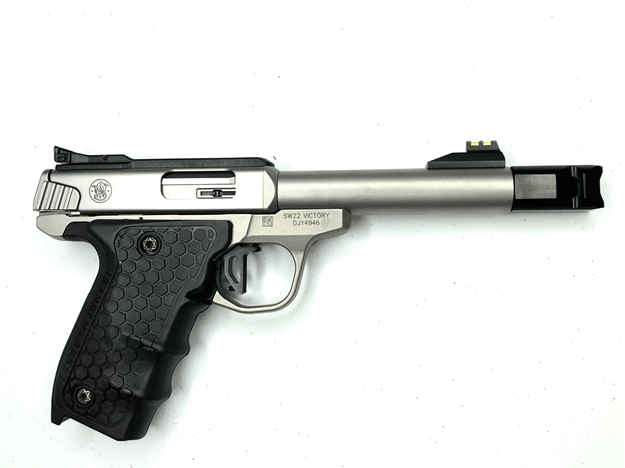
After I received the two prototypes I immediately went to the range.  I put the compensator on the lightest handgun I could find to see how it reacted.  The testing exceeded my expectations – it was flattest shooting Ruger 22/45 lite I have ever shot.  Below is a picture in the dark to get a flavor for the compensator in action.  You can see what is left of the fireball coming out of the top of the gun with residual fire and gas escaping from both sides of the gun.

Now the tough part came, what do we name our new product?  After a lot of brainstorming, we chose the Falcon because the compensator mimics the downward force of the bird when attacking its prey and no creature on earth can match its speed.  This speaks to how stable and fast the gun transitions, its effortless.

After 9 full months of successful testing and over 40K rounds shot through the new Falcon Rimfire Compensator, it was now time for full production and bring our product to market.

Here is a summary of the specifications of the compensator:

  • Anodized 6061 Aluminum – for minimal weight at the end of the gun for fast and easy transitions
  • Progressive port with proprietary angles and chamber to increase down force at the end of the gun – keeps the lightest of guns flat
  • 45 degree side ports for stabilization and sound for timers to pick up
  • Chamfered rear for included O ring timing and mounting
  • Aggressive 45 degree cuts on the front of the compensator not only for aesthetics, but to reduce weight at the end of the gun for fast and easy transitions.
  • Aggressive and aesthetically pleasing style unlike any other compensator out on the market
  • 1911 style crown – well because it’s just cool.
  • Designed and Manufactured in a state of the art facility right here in the USA
  • MSRP $50

It has been humbling to see all of the Falcons out in the wild!  Get  yours today at:

https://wilandusa.com/steve-foster-shooting-sports-falcon-22-compensator/

Thank you for your support!

See you out on the range soon!

Steve

Where is the Dial again?..

Recently, I posted a video on the Steve Foster – Competitive Shooter page on facebook (also found here https://www.youtube.com/watch?v=U-To_zIg8I8 ) talking through my thought process of shooting my CWA Rimfire Pistol Open gun on a plate rack.  In the last few months I have been trying to ‘push’ my Targeted Edge Dial a little too hard with my pistols.  I believe, this is a direct result of all the time I have been putting in with my Magnum Research Switchbolt and JP PCC.  The Edge for each of these guns is different and I need to do a better job remembering this when I get to the firing line.  Of all the tools I have in my bag and out on the range, the Plate rack is setup exactly the same and it can be measured equally, every time.  When I am struggling to shoot with the fundamentals of marksmanship, I turn my attention to the plate rack and it ‘settles’ the Targeted Edge Dial to the appropriate percentage.

My GT Targets plate rack has six 8” plates and when I shoot it at 12 yards away, I know I need to have a proper sight focus to make my hits.  From time to time, I can get away with an occasional target focus, but this is not a consistent way to shoot.  As I walk through in the video, I need to be able to know where my Edge is of my capability to shoot a good time.  I know my 100% is in the 1.80 second range, needless to say, I don’t go into the first string trying turn my Targeted Edge Dial to 100% or greater.  I start at ~ 85% to get my hits and then turn my dial to the appropriate % to start to push the pace, but remain in control as I demonstrate in the video.


There has been a lot of discussion and personal reflection in the past couple of weeks around how to shoot well and my video sparked some discussion around does my Targeted Edge seem different from day to day or match to match.  First, let me share some reflections and opinions of what can influence the Targeted Edge as well as subconscious shooting:

  1. Gun or ammunition failures
  2. Poorly setup targets or targets themselves
  3. Impact of shooting a major match – without a lot of major match experience

First, gun or ammunition failures can be more than a distraction and something, which can be frustrating.  When shooting speed competitions such as Steel Challenge or Rimfire Challenge you need to be shooting in the subconscious.  As we have talked through previously, subconscious shooting is always faster.  Anything that interrupts this information flow effectively, slows down the process whether we know it or not.  As the range command is given, “Are you ready… Stand by..” if you are wondering if your gun will go bang, you will not be able to let your subconscious take over.  Now, you are thinking about the gun running and looking, feeling, or trying to be proactive with anything, which does not seem right.  This takes attention away from what you are here to do.  Your Edge has not changed at all, but your ability to perform at the Targeted Edge has changed.

Similar to gun or ammunition failures, poorly setup targets or targets with exposed hangers can have the same impact on a shooter.  With an exposed hanger, if you call a shot high and you don’t have a second validation of an audible ring or a clear ability to see a hit you question your ability to shoot which results in double tapping a target you have already hit.  Some are particular to how stages are setup in Steel Challenge competitions because we rely on doing the same thing over and over again.  In a recent match, I missed the stop plate twice on Five to Go (both strings with make-ups) because I was relying on my natural swing of my body and gun and I was shooting just over the top of the target.  After the second string I realized the Stop plate was 6-8” low, I made a mental adjustment and followed-through with eye on the sight, on the stop plate without missing the remaining three strings.    Needless to say, my second and third strings were slower than where I like to shoot in a match, but I knew I had to “dial” things back to shoot more consciously to score well.  My 4th and 5th strings were back in the 85-90% range.


Lastly, shooting at a major match or traveling to a new club can increase the ‘nervous’ feeling we have while shooting. In my experience, this is when the Foster Effect rises to the surface.  I have to reassure my 85-90% times are good enough and trying to shoot 110% strings on my first string of my first stage is not a recipe for success.  After all, I have a tried this numerous times without success.

In summary, our shooting Edge does not change overnight, but it can change with time and practice.  Therefore, the Targeted Edge Dial does not change either.  What does change is the mental influence we allow to impact our shooting performance.   If you feel the Edge has changed for you in a division or on a stage, a match is not the place to make this determination… it is to be questioned and validated on the practice range.

See you out on the range soon!

Steve